
Submitted by Rob West
This season has sparked a surge of interest in rainwater harvesting, as more people look for sustainable ways to make the most of heavy rainfall. With climate change bringing both intense rains and longer dry spells, storing water when it’s abundant is becoming less of a niche practice and more of a necessity.
On Gabriola Island, where winters are wet but summers are parched, residents have been experiencing this challenge firsthand. Several years into his homesteading journey, and with a thriving vegetable garden and orchard to keep alive, Rob West, Acquisitions Editor at New Society Publishers decided it was finally time to capture the rain and put it to work for.
This blog, written by Rob West, is a adapted from the original 2020 post, revisiting the project and the lessons learned in building a DIY rainwater harvesting system for garden irrigation.
Six years into our housebuilding and homesteading life on Gabriola Island, British Columbia, we now have a quarter acre veg garden, dozens of fruit and nuts trees and rows of blueberries, gooseberries, currants, raspberries, and other berries.
Gabriola Island is a high-latitude Mediterranean climate, with rainy winters and very dry, warm to hot summers, often with weeks between rains. While the island is water stressed in the summer, a situation likely to increase as climate change starts to bite, our winter rainfall is significant so rather than a water supply problem on the island, we have a water storage problem.
Our groundwater well is a poor producer with a recharge rate of about 4 litres per minute, while the borehole itself stores about 1500 litres, limiting our veg garden to about 25 minutes of continuous drip irrigation before we risk running the well dry. Growers know that generally it’s better to irrigate longer and less frequently but we’ve never had this luxury, having to irrigate in daily short spurts. After three years of meagre rationing and weekly dry well episodes, this spring I installed a rainwater harvesting system with a well top-up capacity.
I did all of the work myself with the exception of installing the pump and pressure tank and related plumbing, which was done by a professional plumber.
Step one in planning was to review Essential Rainwater Harvesting, by Rob and Michelle Avis. Given our needs – a basic non-potable water system – I focussed on Chapter 4, Anatomy of a Rainwater System and Chapter 5, Collection and Pre-Filtration.
Here’s how I did it
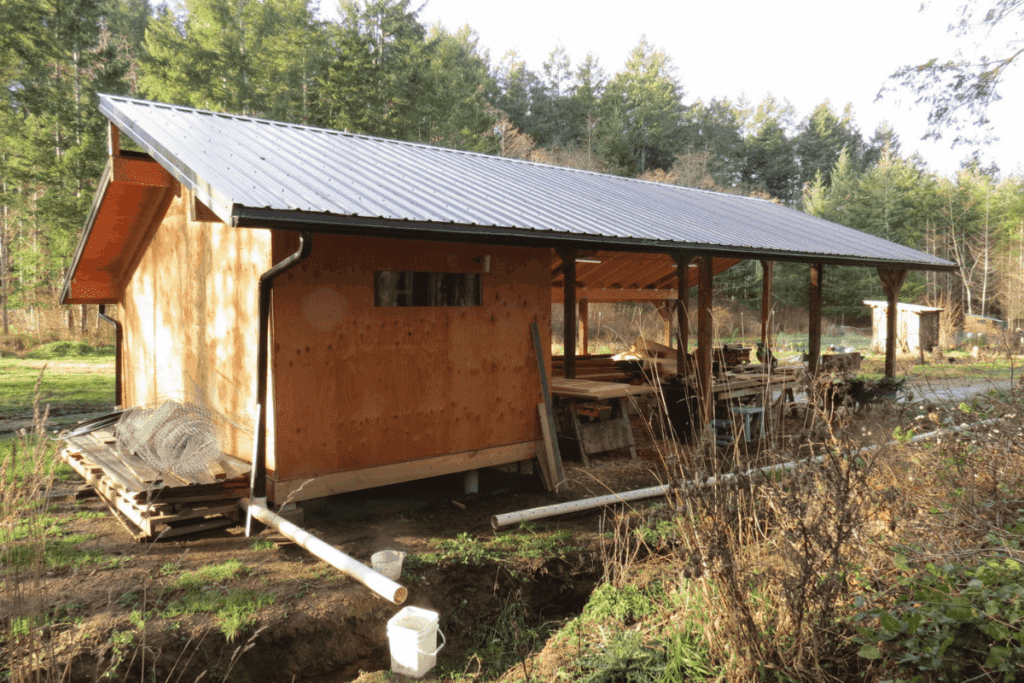
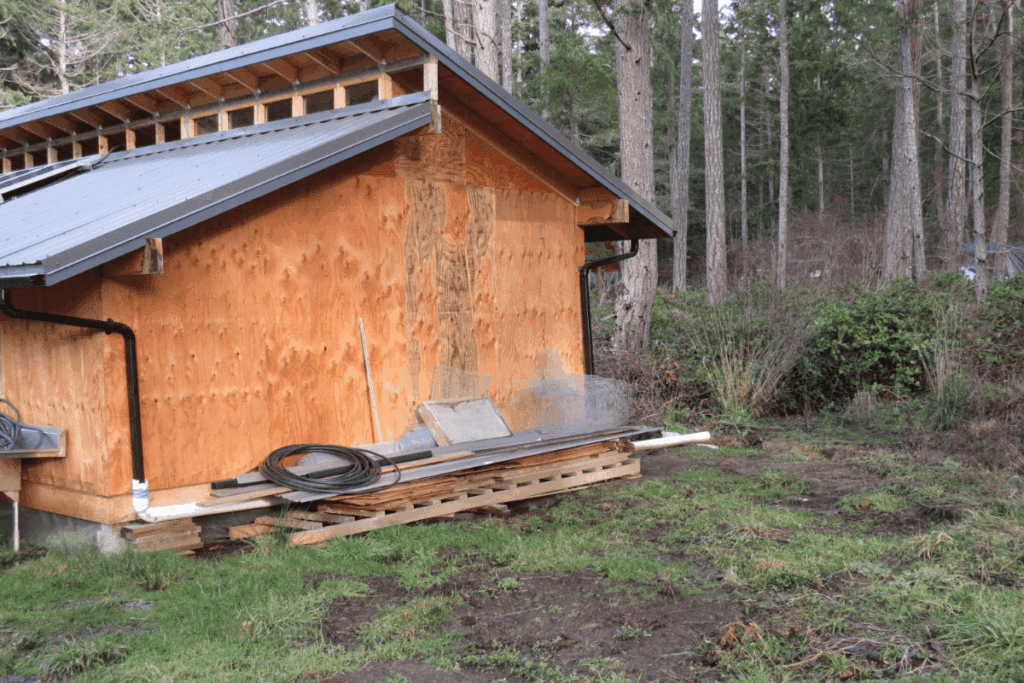
Water is collected off an outbuilding roof into a cistern and from there a jet pump sends the water into a pressure tank and then on to a hosebib on the outside of the outbuilding adjacent to the garden. From here we can connect it to our dripline system for the veg and hoses for handwatering fruit trees.
The collection area is the north facing metal roof of an accessory building, with a collection area of 528 SF [44×12’] / 49 m2. At a 75% collection co-efficiency – the average amount of rain that makes it into the cistern – the system has the potential to collect 35,200 litres of water annually.
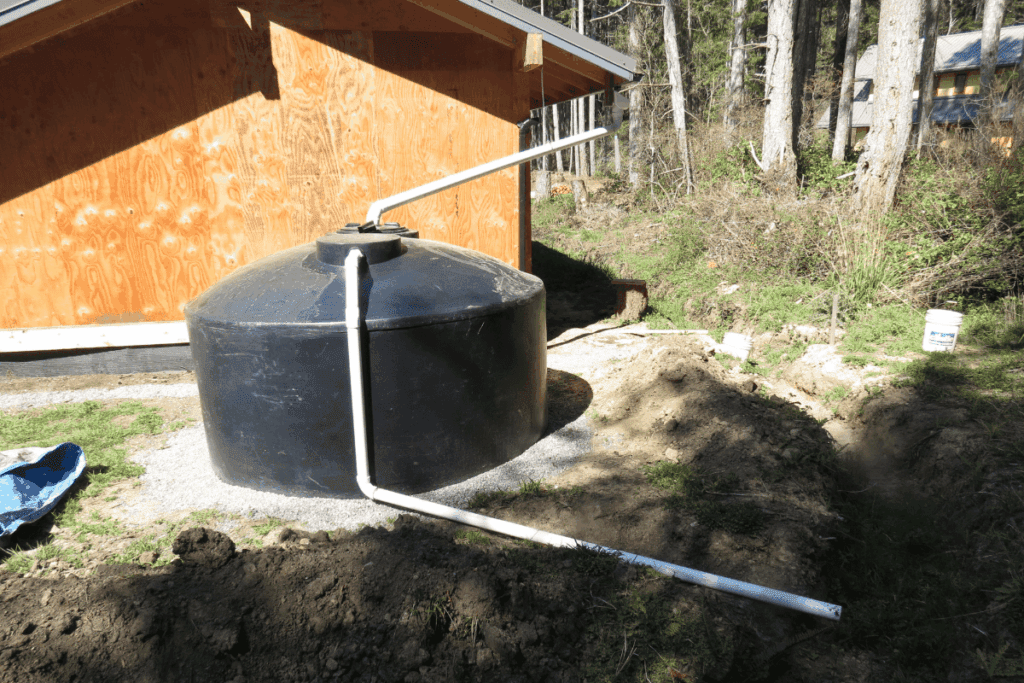
I scribed a circle about 30cm winder than the cistern and dug out about 20 cm of topsoil, piled up for future garden use. In the hole I installed a simple 100m / 4” drainpipe wrapped in landscape fabric to act as a drain running to the adjacent drainage ditch and then poured in about 20 cm of pea gravel. This will ensure that the cistern doesn’t sink in saturated ground during the winter. I tied the cistern drain into a drainpipe across the east side of the outbuilding to stop water flowing under the building in winter.

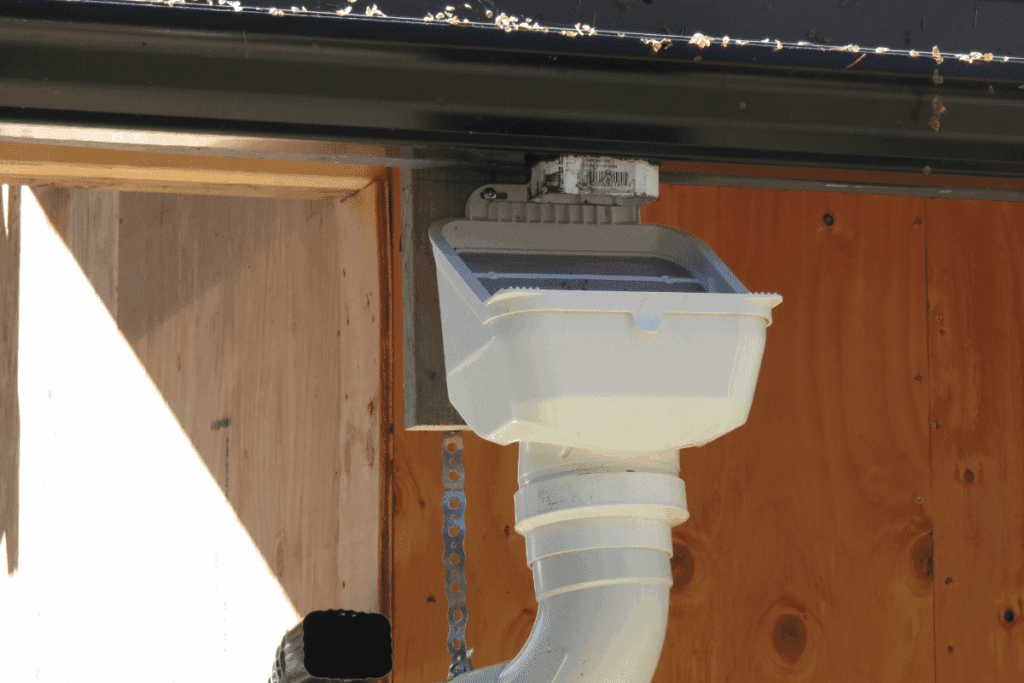
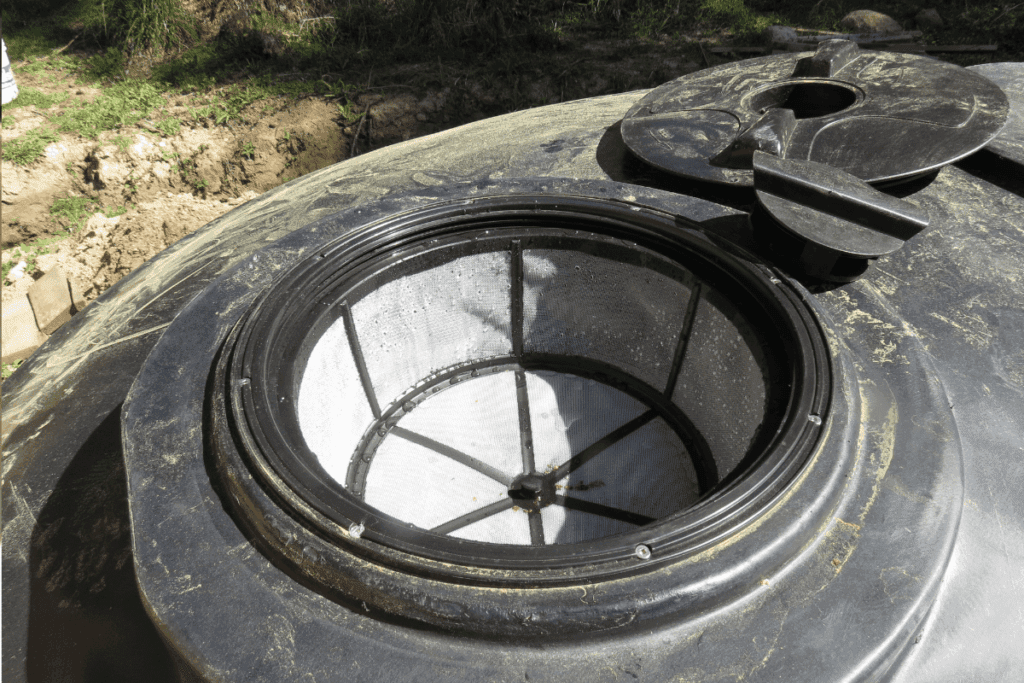
After rolling the cistern into place I installed the 800-micron rainhead debris trap on the eavestrough downspout, and a 3” pipe to route the water to the cistern intake. Inside the access hatch I installed a basket filter to keep out mosquitoes and other insects.
Next, I installed a bulkhead filling and an overflow pipe to the drainage ditch so the cistern can self-drain when it becomes full.
With the main bits complete, I called my plumber and he installed a 2” valve and then 1” Schedule 40 PVC piping into the outbuilding.
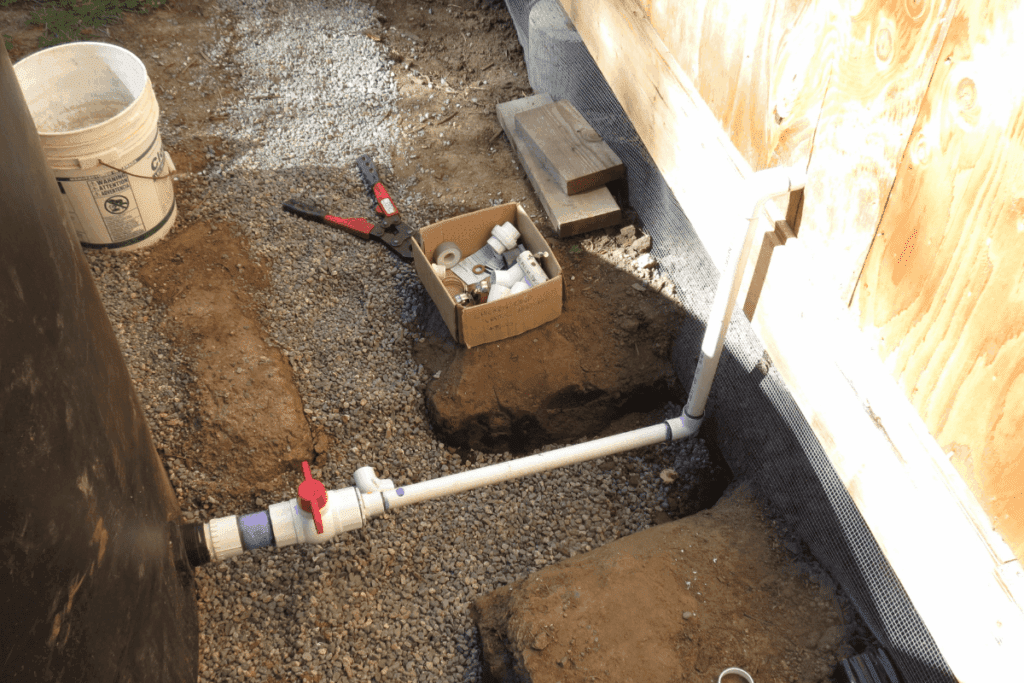
Inside the plumber installed a jet pump and pressure tank and ran a waterline to a hosebib on the outside of the building facing the end of the garden. All pipes can be shut off inside the building during winter.

Between rain events, the cistern can be topped up with a timer over several days from an existing waterline from our well, allowing us to ‘sip from the well’ and ‘drink from the cistern’ for weekly irrigation sessions.
Potential Future Expansion
With the piping and pump and other infrastructure now in place, as our needs evolve, we can easily add capacity by simply adding additional cisterns in a daisy chain. If need be, we can tie in the south side of the accessory building roof, adding a further 41 m2 of collection area, boosting annual collection by a further 29,500 litres to a total potential of 64,700 litres.
System Components
- 1200 IG / 5455 litre Premier VW1200 polyethylene cistern, certified to CSA B126 / NSF/ANSI/CAN 61 for potable water
- 2 cubic yards of pea gravel for tank base and drain system
- ~ 20’ of 3” poly pipe for water conveyance, overflow
- ~ 20’ of 1” Schedule 40 PVC potable waterline
- ~ 20’ Pex waterline
- Leafeater downspout debris trap [rain head] with 800-micron stainless steel mesh
- Basket debris trap for the cistern
- Jet pump
- Pressure tank, pressure switch, and controls
- Plumbing fitting and valves
Total costs for materials was about $3,100 and $500 for the plumber’s time.